
We offer high-quality 3D printed RC plane files for RC plane enthusiasts. Simply download our models and use your own FDM printer to get started. We include optimized print profiles for you starting to print and to ensure a seamless build with your choice of filaments.
Download, Print, Assemble & Fly

Included in the download:
- OWLplane model STL files.
- G-code using PLA or LW-PLA type of filaments (depending on models) with Prusa i3 Direct Driver and/or Bowden type Printer. In 2025 onward, no G-code provided since OrcaSlice can send the G-code directly to the 3D Printer.
- ideaMaker, Cura and S3D OWLplane Profile files for 0.3mm and 0.4mm Nozzles for PLA model series, both DD and Bowden type printers. For LW-PLA/ “Digital Balsa and Foam” series, both nozzle sizes (0.3mm and/or 0.4mm) and Direct Drive or Bowden type of printers use the same Profile files due to LW-PLA filament specific characteristic when printing. For “Digital Balsa and Foam” series, S3D is replaced with PrusaSlicer slicers due to that there is no gyroid infill patterns. In 2025 onward, They are simplified by utilizing OrcaSlicer (just update the Profile or select the correct Profile to print).
- Instruction Manuals (User, Assembly, Print Guides and Drawings).
Please check your email on how to download the files after purchasing.
OWLplane have already tested our Models printed with PLA, ABS, ASA and HIPS filaments. OWLplane also provide G-code files if you would like to print directly to your Prusa i3 Direct Drive, Creality Ender 3/5 Families or Others with both Direct Drive/Bowden setup with PLA Filament only. No worry, for other filaments, just change the parameters and slice it again (see PRINT tab above for details).
Please note : starting in 2025, OWLplane does not provide the G-code anymore but Project files using OrcaSlicer.
For having best results, OWLplane recommend to slice yourself with provided Profile files so that you can adjust/optimize them to suite your own 3D Printer requirement.
From our experience, with optimal extrusion width and layer height, it can reduce the printed plane weight expected about 20-30% (for all filaments stated above) from commonly standard Profile file printed with PLA filament.
OWLplane provide Animation and Assembly Videos on how to assembly all OWLplane RC Models so that you can see and learn from the Youtube Videos. More details might not be shown in the Animations and Assembly Videos but will be provided in this website pages and also in the Instruction Manuals.
Congratulation !
You should be ready to fly your plane. But, make sure the CG is correct, the Control Surfaces are well setup, the Motor Power is suitable to fly, etc.


Our goals are to deliver 3d printed rc plane digital products seriously fun to print, assembly and fly !
Printing Is Much Easier Now !
OWLplane Model Part STL Files to Test Print !
- If you would like to test the model parts, please "click me" to go to OWLplane Cults3D page where all model test parts are posted to. *** URL: Cults3D.com and search OWLplane ***
- OrcaSlicer set profiles are also provided for all models "click me". In 2025 onward, OWLplane uses OrcaSlicer to replace Cura, ideaMaker, S3D and PrusaSlier.
- For parts information, you can visit "click me" and select your downloaded model section.

One Slicer Software (OrcaSlicer) for All Models
~ 2025 onward ~

All 3D Printer Profile Files Below Are Provided, “Ready To Use !”


*) BD OWLjet 70mm for 6s Lipo battery background picture
News and Update
Last Update : May 14th, 2026.
- OWL F9F-Cougar 64mm and 70mm EDFs have been released !
- OWLplane OrcaSlicer Profiles for BambuLab P1S, BambuLab A1, Bambulab A1 Mini, Creality K1C, Creality Hi, Creality Ender-3 and DIY Klipper 3D Printers have been released. See below section to learn how.
- We have moved to almost all of our models to Payhip due to Gumroad does not accept PayPal payment anymore. OWLplane Catapult Launcher is still under Gumroad as a free product.
- You can find of all the models that you have purchased by creating payhip.com and/or Gumroad.com accounts with the email that you use when purchasing.
- If you do not create the accounts, please keep your email from us after purchasing for future update or you can ask "info@owlplane.com" for that email again if you have deleted.


BambuLab Ready !
(Sliced with OrcaSllicer)
Ready to Use Profiles : BambuLab P1S, BambuLab A1, BambuLab A1 Mini, Creality K1C, Creality Hi, Creality Ender-3 v2 (Marlin Firmware Machines) & Klipper Firmware Machines.
You can create for other Machines by copying/following the settings from provided Machines above. Once copied, you are ready to slice any OWLplane STL files models ! Visit on how to by clicking “PRINT” and select “ORCASLICER FOR BAMBULAB AND OTHERS”.


We are excited to announce that official BambuLab Profile Files are now available for the P1S, A1, and A1 Mini. These profiles have been fine-tuned to ensure high-quality results for all our models, whether you are printing with standard PLA or lightweight LW-PLA.
Choosing the Right Printer for Your Project
Your choice of printer should align with the scale of the models you intend to build:
BambuLab A1 Mini: Due to its compact heat-bed, this printer is ideal for our smaller jet series (ranging from 50mm to 64mm EDF). It is generally too small for our larger airframes.
BambuLab A1 & P1S: The bed size on these machines is more than sufficient for our largest parts, including full-scale jets and propeller-driven models.
X1 Series: While we haven’t officially tested these profiles on the X1, they should be highly compatible with minor user adjustments.
Focus on the Model, Not the Machine
If you are new to the hobby, we want your project to be the airplane, not the 3D printer. In our experience, many FDM printers on the market require constant tuning, calibration, and part upgrades just to maintain print quality. This can quickly lead to frustration.
We recommend BambuLab because they offer a reliable, “plug-and-play” experience. This allows you to focus your energy on assembly and flying rather than troubleshooting your hardware.
Advanced Materials: ABS & ASA
For builders looking to optimize performance even further, ABS and ASA are excellent alternatives to PLA. These materials offer:
Weight Savings: Approximately 20% lighter than standard PLA.
Heat Resistance: They can withstand much higher temperatures without warping.
Note: Because these materials require a stable, high-temperature environment, we recommend using the enclosed P1S or X1 Series for the best results.


PLA, Digital Balsa, Digital Balsa & Foam
*) not all models support all variants (see the product pages)
Refer to the table below when we say that our models are “PLA“, “Digital Balsa” and/or “Digital Balsa & Foam” series.
(1). Standard Model / PLA Series
Filaments : PLA (standard PLA, PLA+, Hyper PLA, HF-PLA, etc.), ABS, PETG, etc.
Let retraction happening during printing (not considering less retraction) using non-active foaming filaments. Since using non-active foaming, retraction may not affect the printing result.
No-infill is used whenever applicable since the filament density is higher than active foaming filament.
This design generates heavier model compared to both “digital balsa” and “digital balsa and foam” models.
(2). Digital Balsa (LW-PLA) Model / LW-PLA Series
Filaments : LW-PLA *) eSUN, 3DLabPrint, ColorFabb, PLA Aero *) BambuLab, ASA Aero *) BambuLab, LW-ASA *) colorFabb, LW-PLA-HT *) colorFabb, etc.
Note : Active Foaming Filaments
Less retraction using “single-pass”/”vase-mode” (actually forced to avoid retraction, not really single-pass or pure vase mode). There is no infill used.
This digital balsa model should be the lightest at the same time not as strong as when printing/ using infill or printed in standard mode.
(3). Digital Balsa & Foam (LW-PLA) Model / LW-PLA Series
Filaments : LW-PLA *) eSUN, 3DLabPrint, ColorFabb, PLA Aero *) BambuLab, ASA Aero *) BambuLab, LW-ASA *) colorFabb, LW-PLA-HT *) colorFabb, etc.
Note : Active Foaming Filaments
It has to use an active foaming filament. During printing, it adds/uses 3% gyroid pattern infill.
It is not the lightest compared to digital balsa model but still less weight compared to standard model. It is stronger compared to digital balsa model.


*) not all models support all variants (see the product pages)
LW-PLA Jets 50mm and/or 64mm Series


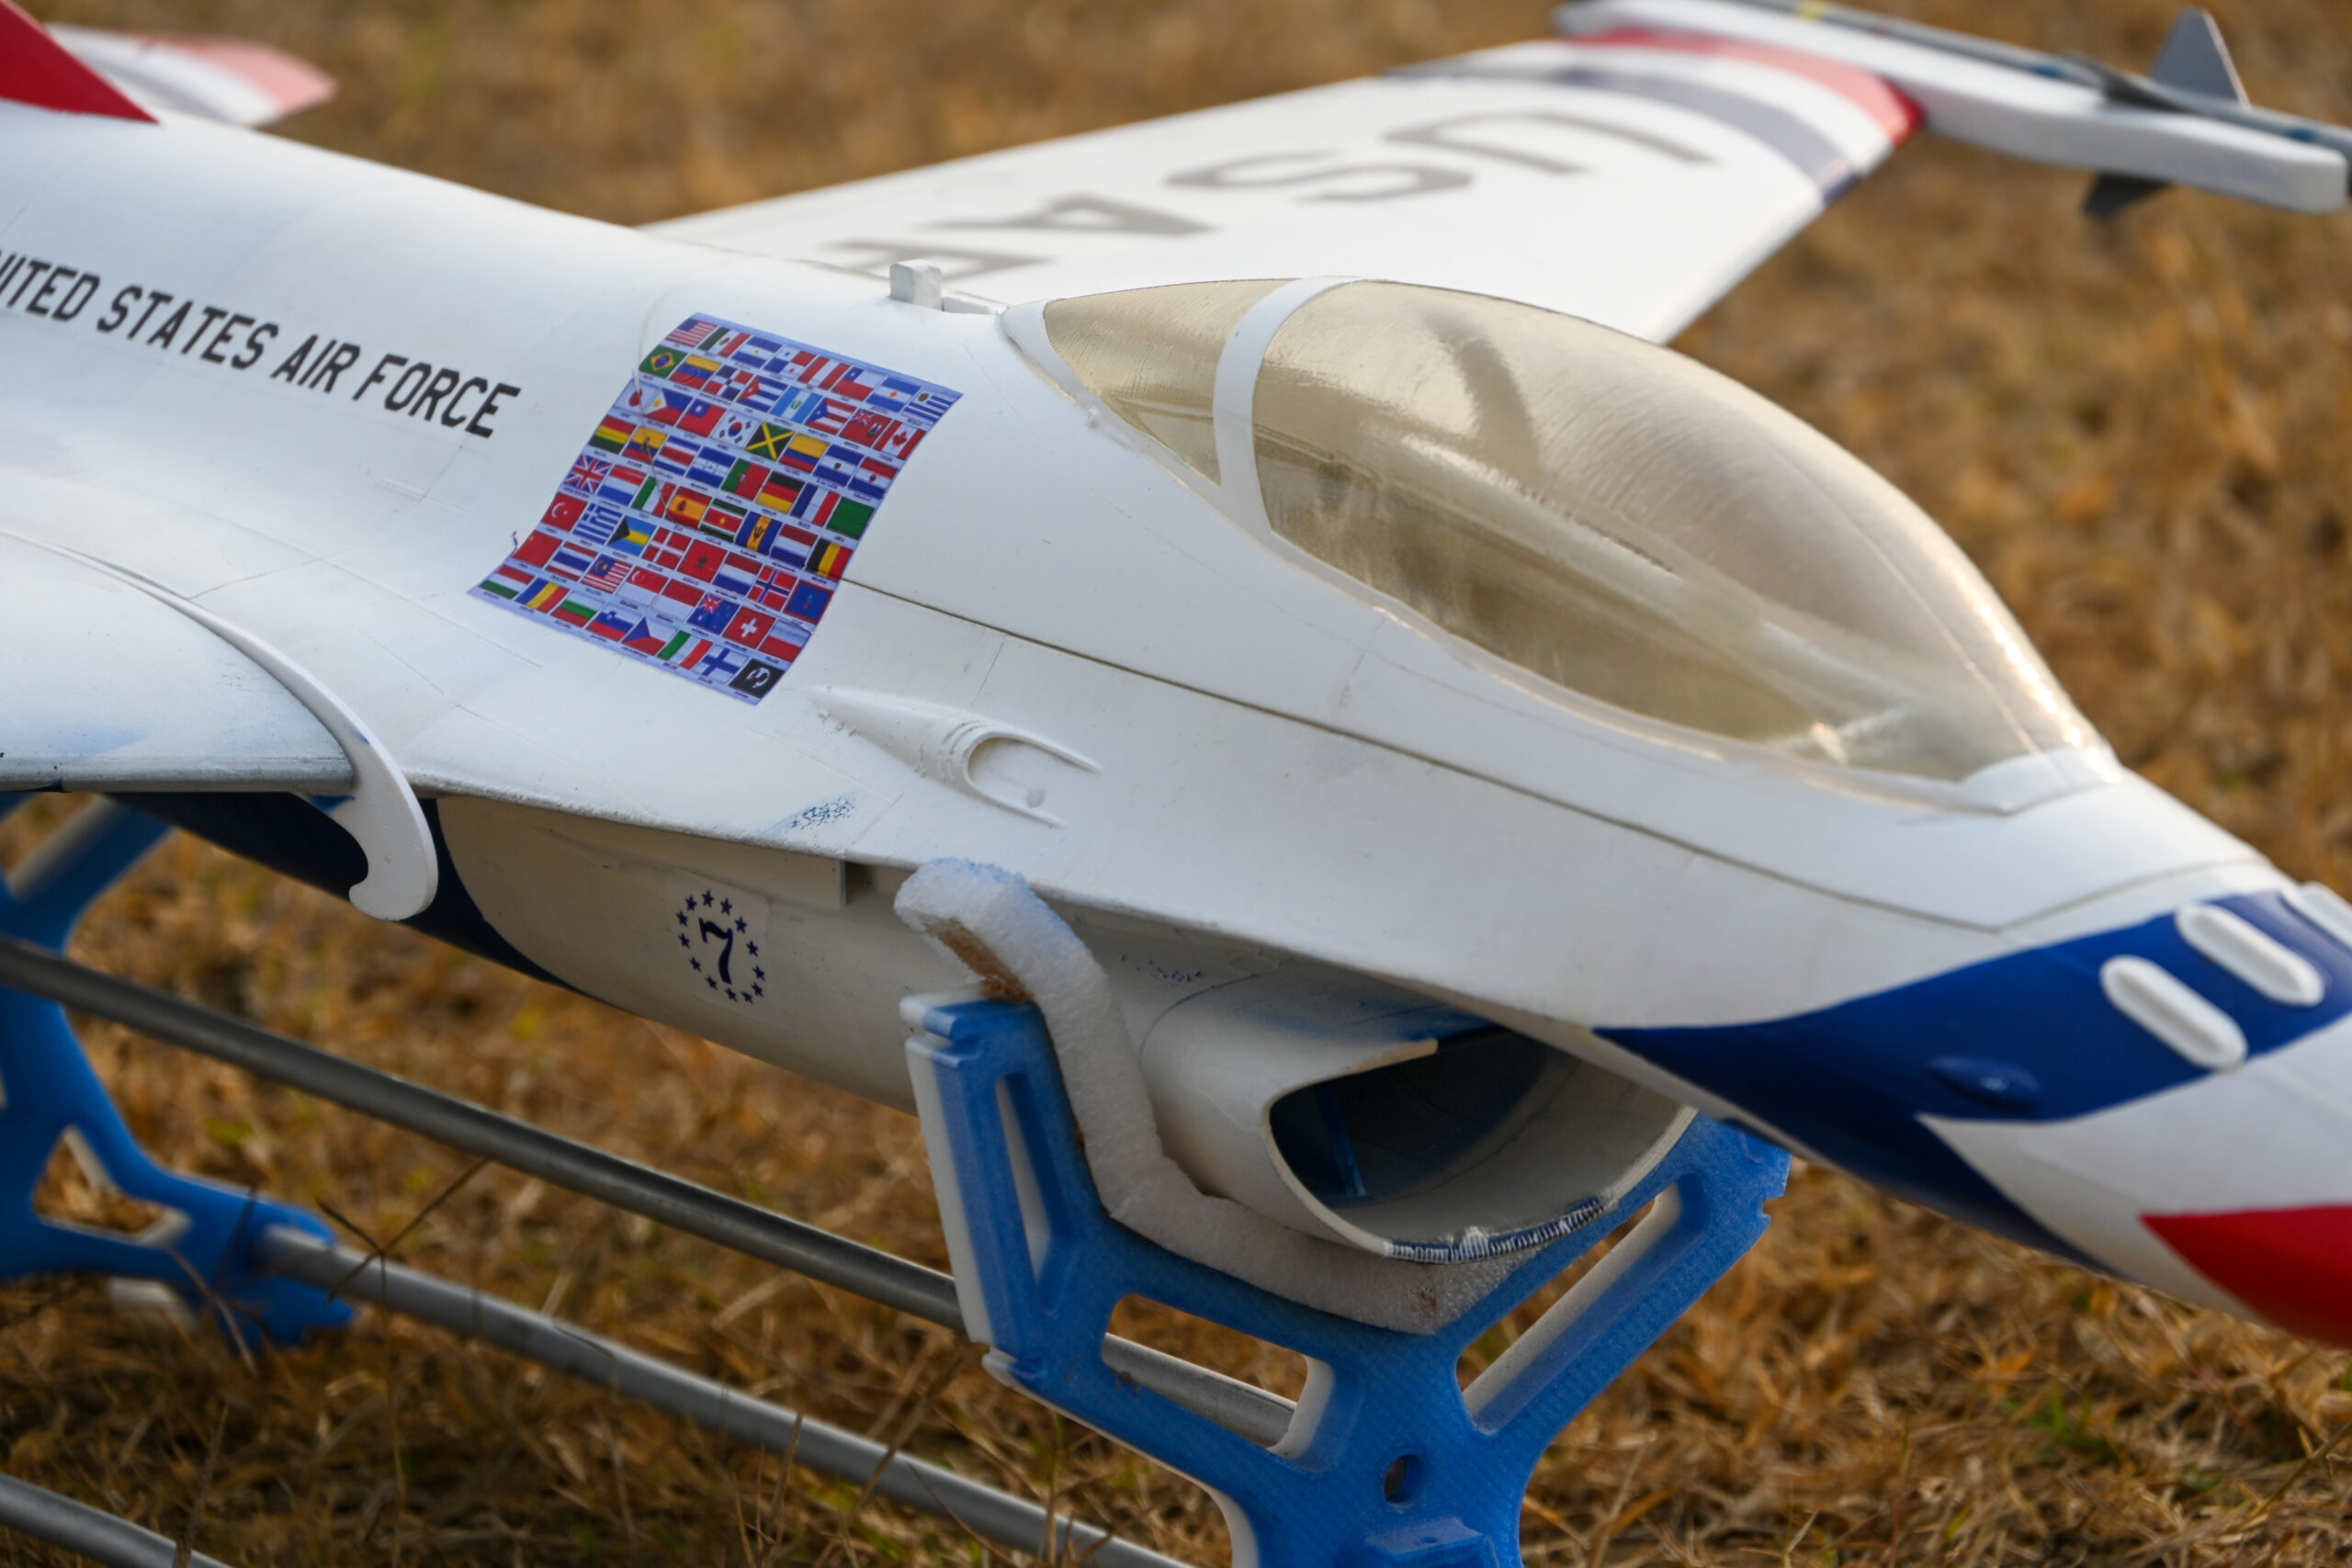
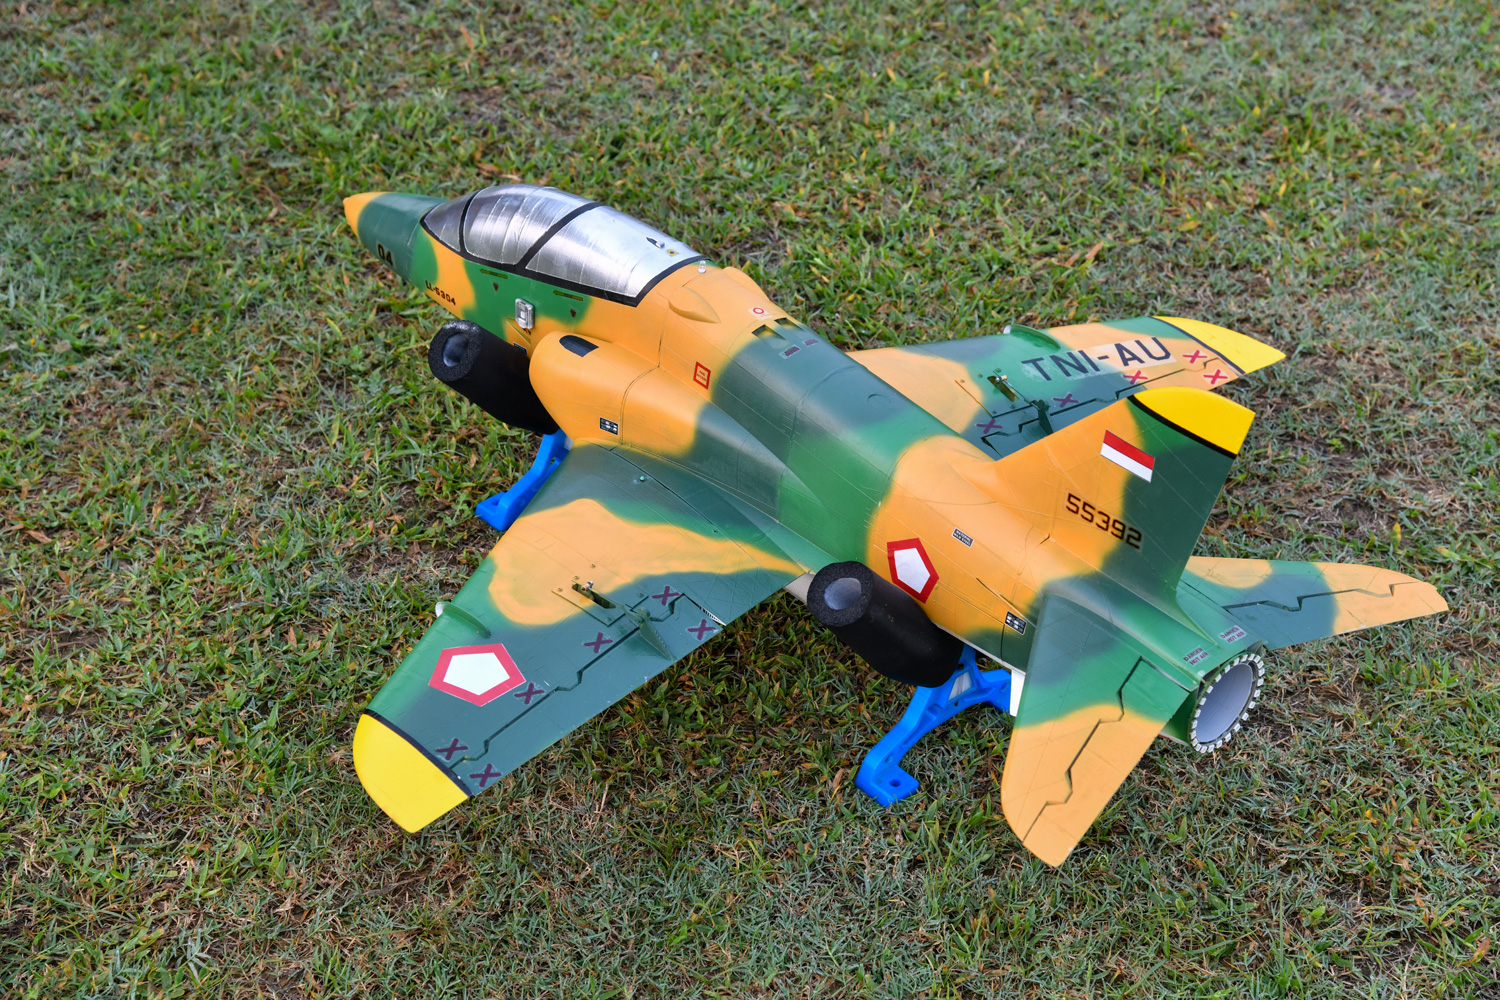
Our Customer Shared Pictures
Last Update : June 12th., 2023
New Pictures shared by Vikram Sharma – OWL F-16 64mm EDF – Thanks so much !


Note : feel free sending us your build/work pictures by emailing us to “info@owlplane.com” if you would like to post your build model pictures in this section.
OWLplane Catapult Launcher
(FREE to Download):
- Click "PRODUCT" Tab and Click "ALL PRODUCTS".
- Find "OWLplane Catapult Launcher".
- Click "FREE" button to process downloading.
- Do not forget to input "OWLplaneCL" discount code to grab it free !
- Follow the process similar to purchase other products but you do not need to fill in any payment information after filling in discount code "OWLplaneCL".
OWLplane Catapult Launcher

1:53

3:20

2:29

6:12

4:37

5:12

5:00

2:58
- OWLplane Catapult Launcher for LW-PLA OWL Jet Series is ready download and it is FREE!
- Firing mechanisms are by pull and/or push
- Should be able to launch 70mm EDF model with 6s battery (around 2kg weight).
- Implementing lock mechanism (securing the catapult).
- 2 type of supporting or holding OWLplane Catapult Launcher from bungee rope force.
- Catapult launcher platform for up coming OWLplane jet models.


How To Get Free OWL Catapult Launcher
(Available through our Store in Gumroad):


Newly Added Videos
Animation and Assembly Videos (Build Guides for All Models)
A complete set of animation and assembly videos is provided for all Models.
Animation Videos
- Quick to identify the part.
- Easy to locate the part location and position.
- All part relationship well understood.
Assembly Videos
- Steps in detail easy to follow.
- Bring more convidence to assembly.
- At the end, speed up your built.
OrcaSlicer For All Models
Simplifying The Slicer
20% to 30% Reduced Weight or More with LW-PLA/ePLA-LW for Some Parts
Initial Profiles are optimized for PLA and LW-PLA
OWLplane Features and Solutions
Supporting Features
Please note that in 2025 onward, "OrcaSllicer" Is The Only Slicer Software Supported For All Of Our Models
~ Slice STL Files with Your Favorite Slicers Below ~
but Not Limited To
Provided Profile Files Models before 2025 :

Version 4.8.0

Version 4.0.1
(do not use ideaMaker software for Prusa printers since M221 command to change the flow rate is ignored by the printers)

Version 4.1.2
(replaced with PrusaSlicer for “Digital Balsa and Foam” series but the new release Version 5.0.1 can slice with Gyroid type of infill. If you have Version 5.0.1, still can use the slicer)
Version 2.5.0
(available for “Digital Balsa and Foam” series only, not yet updated for standard profiles but it can slice them correctly)
Starting 2025, we only use OrcaSlicer for All Models !


Initially, OWLplane only utilize S3D during development time. After having experience utilizing ideaMaker, both S3D and ideaMaker Slicers are used since both having the same required features and easy to use. In short, S3D has better preview on sliced object where ideaMaker has better user interface/workflow for working on different Profiles in OWLplane subjective opinion.
If you have not invested in S3D, OWLplane highly recommend to use ideaMaker instead, no difference from slicing OWLplane 3D Printed Plane and its free ! No worry, if you have invested your time and your favorable slicer is Cura, OWLplane provide Cura Profiles and STL file modifier to use for slicing OWLplane STL files. It can slice what ideaMaker and S3D also slice with utilizing STL file modifier,
Cura is another excellence free slicer. Unfortunately, Cura is not as easy to use when requiring feature like it has in ideaMaker and S3D for creating different setting for layers. ideaMaker uses “Layer Group Settings”, S3D uses Processes and Cura uses object modifier or support blocker technique. In cura, you have to modified object instead of by adding/updating/introducing some settings. It is not as convenience as ideaMaker and S3D in OWLpane subjective opinion. Dont get us wrong, OWLplane also support Cura.
Feel free if you still want to use Cura instead. It also works without any issue.
Ref.:
– Visit this excellence site showing ideaMaker supporting resources.
Please find below some website page and youtube resources how to change group layer settings in Cura way:
– URL #1 : Slicing our models with Cura from 3DLabPrint website
– Video #1 : 3 Cura Slicer Setting Tricks For Beginners
– Video #2: Ultimaker Cura – Customizing Print Settings in Specific Parts of a Model
20% - 30% Less Weight with PLA Filament (Applies Only for Non LW-PLA Filaments)
OWLplane first customer comment: Sliced with Cura, suggested 0.32mm extrusion technique worked well, 20%+ lighter.
More comment/info about ST1 OWLplane, just click the comment on the Youtube and also ST1 OWL thread from RCGroups to know more:
RCGroups thread * ssatoru, posted on Apr 01, 2021, 11:01 AM. *
Credit to ssatorugm/ssatoru for sharing his built.
OWLplane First ST1 OWL Customer Youtube Video:
Riding ST1 OWL also shared by ssatoru:


Reducing EXTRUSION WIDTH
By reducing extrusion width to below .40mm and it is also suggested to replace your nozzle from 0.40mm down to 0.30mm nozzle. No worry, 0.30mm nozzle is still able to print extrusion width with more than 0.4x extrusion width.
PLA still can have decent strong result by lowering extrusion width comparing to ABS since its material property is stronger than.
REDUCING LAYER HEIGHT
Since the extrusion width gets reduce, it means that need also to reduce the layer height also. Since, it will get more contact surface areas from layer to layer to compensate.
USING ABS, ASA or HIPS INSTEAD OF PLA
The benefit of ABS, ASA and HIPS is that you can print with the same extrusion width and layer height as PLA settings but can get benefit of less weight since their densities are about 20% lower comparing to PLA. They are also more heat resistance comparing to PLA.
"Reducing Extrusion Width means that you need also to reduce Layer Height to keep strong layer to layer adhesion"
OWLplane uses "Strength Level Code" as depicted on the left side table for easy to track the strength and weight comparison
Feel free to experiment with Strength Level Code -1 parameters for ABS (also ASA, HIPS), since it really depends on the filament quality
For your consideration, the benefit of taking 20-30% printed weight off is about the same weight as the rc plane battery itself. All OWLplane Models have been tested successfully with 0.30 extrusion width and 0.17mm layer height for PLA (Strength Level Code L0) and with 0.38 extrusion width and 0.2mm layer height for ABS (Strength Level Code L1).
Optimizing Your Printed Result Some Suggestions (Applies Only for Non LW-PLA Filaments)
Starting with 0.32mm Extrusion Width for PLA (continue optimizing from that value).
Hints for 0.4mm Nozzle:
- For PLA Filament : Set to Strength Level Code L3 instead as your default/start value (or 0.40mm for extrusion width and 0.20mm for layer height) if it can not print with decent result with Strength Level Code L1.
- For ABS Filament : Strength level Code L1 should be ok (OWLplane default value), increase gradually when print quality is affected by 0.4mm Nozzle
finding optimal setting values to get optimal weight and strength
Start with default Strength Level Code and optimize the values from there to get benefit of optimal weight with adequate strength level. Visit Print tab page for more information.
Optimizing Some Parameter Values
You may need also to review print quality not just strength level. Visit PRINT tab above and select PRINTING AND SETTINGS SOLUTIONS page for more information.

Figures above are for your reference. FUSELAGE-2 # P3_H15 from OWL MDM-1 Fox plane model is printed with commonly standard Profile settings and the weight is measured 46g as seen on the right side both figures as reference. Printed with PLA filament, extrusion width 0.42mm, layer height 0.25 and extrusion multiplier 1.02. If you would like to prove it, just download the provided Test Files and play with them.
The results are as follow:
- PLA: Strength Level Code L1 and L0 are 36g (22% lighter from ref.) and 32.5g (29% lighter from ref.) respectively.
- ABS: Strength Level Code L3 and L0 are 41g (10% lighter from ref.) and 33g (28% lighter from ref.) respectively.
Reuse Your Servos
Utilizing 3D printed Servo Cover and Bridge.
SERVO COVER FOR ATTACHING THE SERVOS
Number of STL Servo Cover files are provided for range of Servo Brands, if none of them fits to your Servo, a STEP file is also provided for your convenience to modify it so that it will perfectly fit with your Servo.
SERVO BRIDGE FOR HOLDING THE SERVOS
Number of STL Servo Cover files are provided for range of Servo Brands, if none of them fits to your Servo, a STEP file is also provided for your convenience to modify it so that it will perfectly fit with your Servo.
Some Printing Solutions
Three figures below showing bottom, full and top views from left to right respectively. Both bottom and top views have 3 perimeters so that it makes joining surfaces larger comparing to printed with only 1 perimeter at the top layers (see thicker layers at top and also bottom). This printing technique can be found under PRINT tab above on the Printing and Setting Solutions page.
*) This technique is not applicable for “Digital Balsa and Foam” approach.
Please Note : Provided Profile and G-code files for all Models are set with 3 perimeters at the bottom layers only. Adding more perimeters for above layer as shown below is required whenever you feel that you need more surface areas for stronger bonding.

SOLUTION FOR CURA SLICER
The solution is by getting help from STL modifier file. Need to change the printer perimeter setting value on the modifier into 2 perimeters and increase material flow by 125% or more. Increasing flow is required so that the printed perimeter touching its next shell. This technique is not perfect since Cura has limitation on tweaking layer per layer settings.
SOLUTION FOR IDEMAKER SLICER
As explained in one of the above section, just use "Per-Layer Settings under Group and Layer Settings" setting. It needs to set gradual increment to form stairs for layers as shown on the left side figure. The Profile and test files are included in the free to download test files.
SOLUTION FOR S3D SLICER
As explained in one of the above section, just use "Process" setting and also use the same technique shown in ideaMaker solution above.
How to Access Your Purchase Files - Free Download *** Gumroad - Before Black Friday 2004 ***
If Purchase Using Gumroad Store (Previous Online Store)
- You can access your purchase files from two ways.
- (1). Access from your Gumroad receipt.
- (2). Access from your Gumroad Library (by Creating Gumroad Account)
Please Note : OWLplane Catapult Launcher Product Is still Under Gumroad Store.
How to Access Your Purchase Files - New OWLplane Store is Under payhip Services *** Black Friday 2004 Onward ***
If Purchase Using Payhip Store (Our New Store)
- You can access your purchase files from two ways.
- (1). Access from your payhip receipt.
- (2). Access from your payhip Library (by Creating payhip Account)